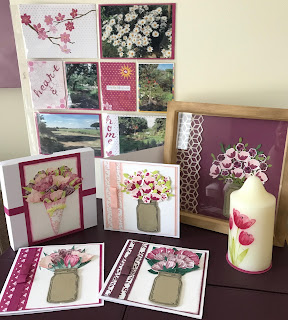
Tutorial for Explosion Box with 3D Celebration Cake
Yesterday, I had time to craft, and using some inspiration from Pinterest I created a couple of Explosion Boxes, with a 3D Cake inside the box.
I have been asked for a tutorial for the Box/cake - so have made a box today using the Oh So Eclectic Suite, and the 2017-2019 In-Colours. I love flowers, and have used the same retired punch on all 3 examples, but you can use any floral die set from the catalogue, or punches, or even decorate the cake with any other die set from the Stampin' Up! catalogue to make this project suitable for all occasions both male and female.


I have been asked for a tutorial for the Box/cake - so have made a box today using the Oh So Eclectic Suite, and the 2017-2019 In-Colours. I love flowers, and have used the same retired punch on all 3 examples, but you can use any floral die set from the catalogue, or punches, or even decorate the cake with any other die set from the Stampin' Up! catalogue to make this project suitable for all occasions both male and female.

This is a close up view of the inside of the box with the lid, and then the view with the box closed at the end of the blog post.
The papers are from the Oh So Eclectic Suite in the current annual catalogue. I have chosen 2 designs which work well with the Tranquil Tide Cardstock from the 2017-2019 In-colours.
To start - using a 12"x12" piece of card, score at 4" and 8" along each side of the card.

Cut away the squares in all 4 corners to create a cross shape.

Cut out the following:-
4 pieces of cardstock 3 3/4" x 3 3/4"
4 pieces of Designer Series Paper (DSP) 3 5/8" x 3 5/8"
- these are for the outside of the box
4 pieces of cardstock 3 3/4" x 3 3/4"
4 pieces of Designer Series Paper (DSP) 3 5/8" x 3 5/8"
- these are for the inside of the box
Matt & layer these pieces to decorate the cross
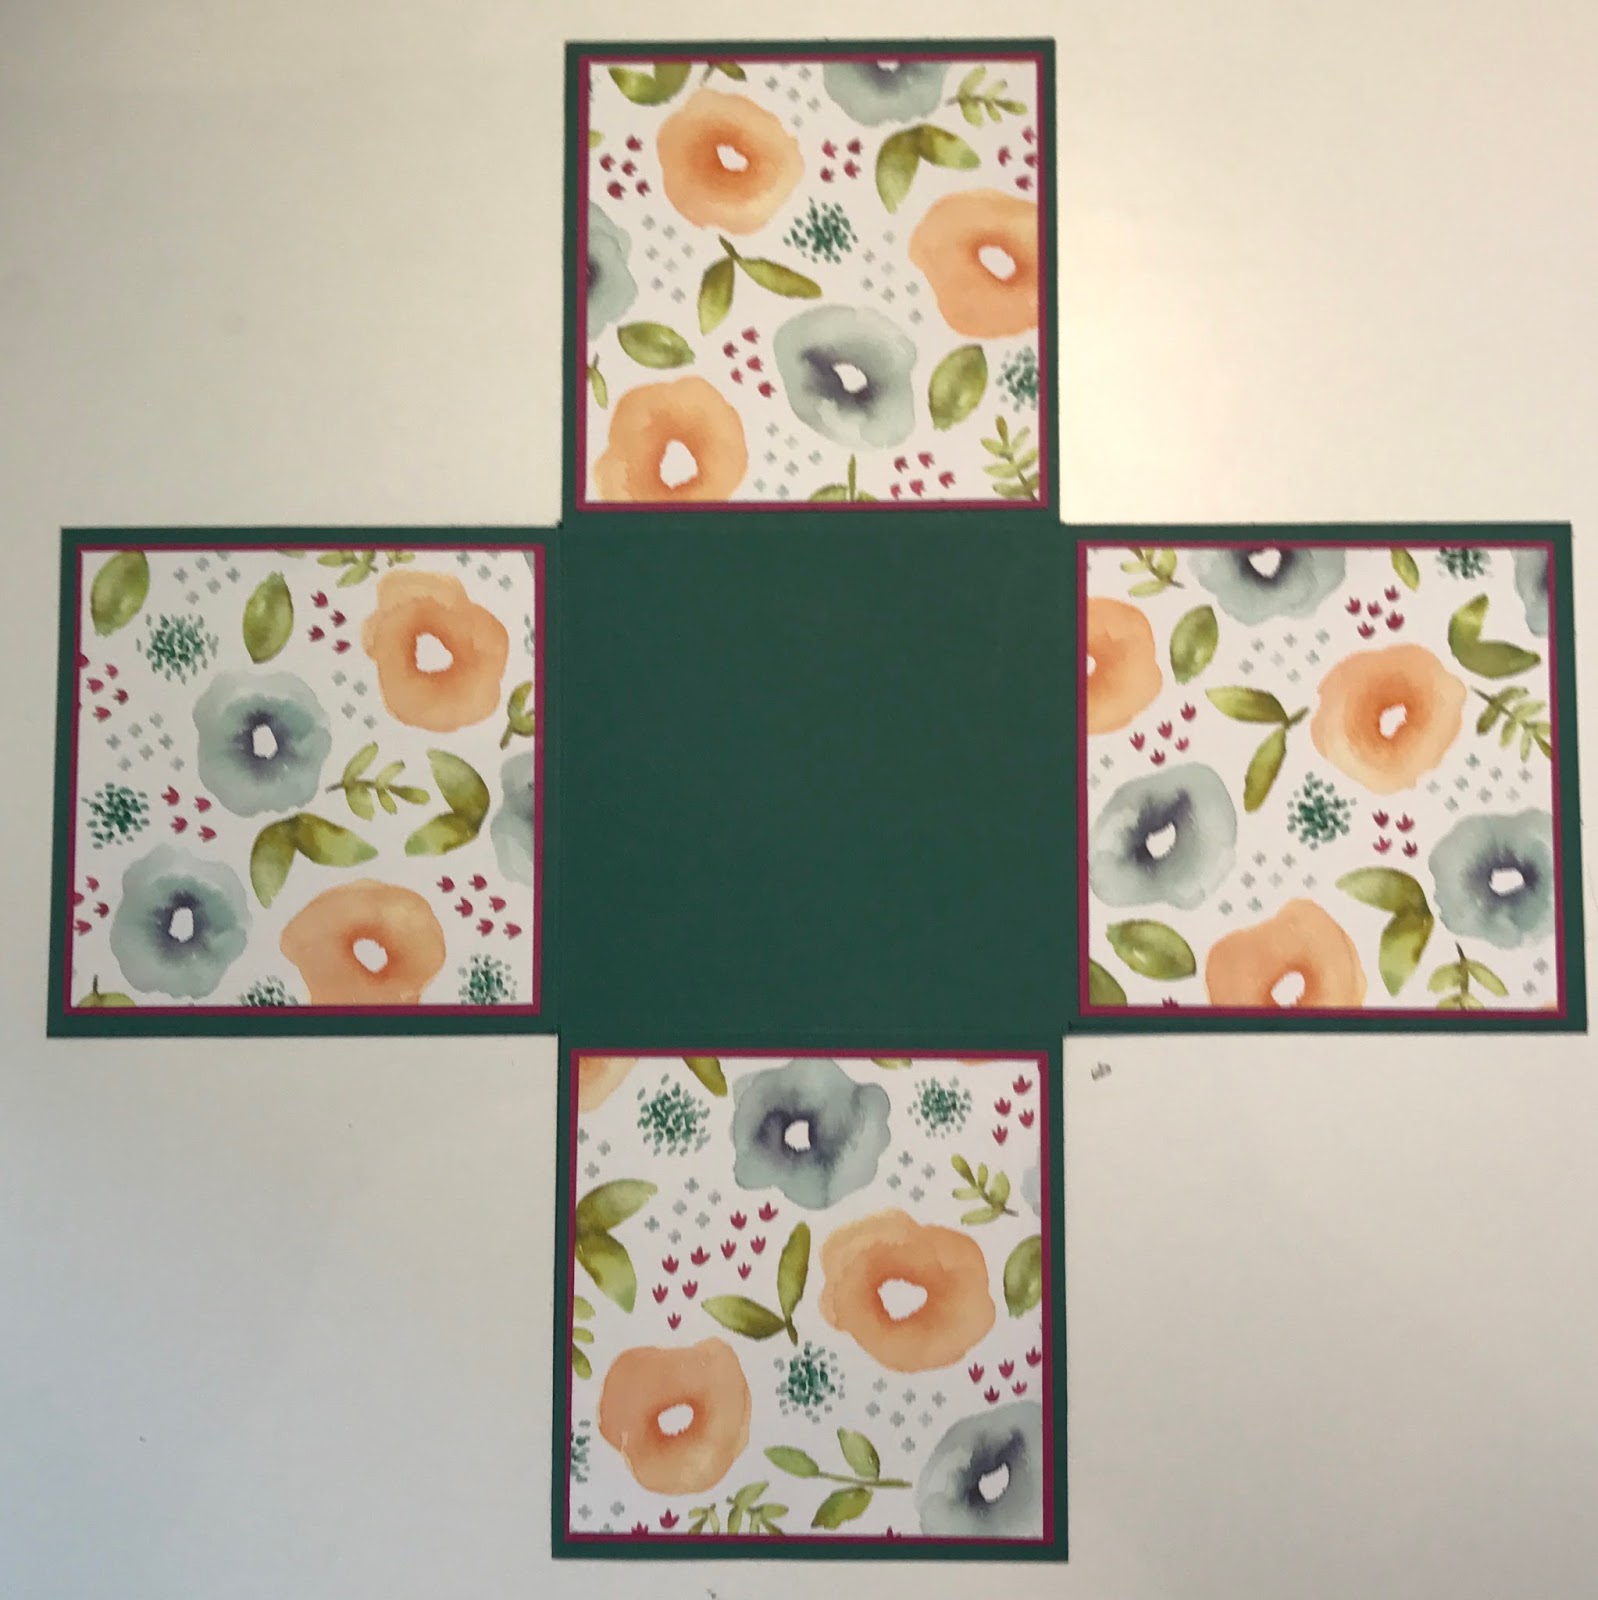
Outside

Inside
I've used colours that co-ordinate with the DSP - using the bolder pattern on the outside of the box and more subtle pattern for the inside.

To create the tiers of the cake, cut out 3 pieces of card (1 each of) and score as follows:-
6" x 3 1/2" - score at 1", 2 1/2", 3 1/2", 5" on long side, and 1", 2 1/2" short side
7" x 4" - score at 1", 3", 4", 6" on long side, and 1", 3" short side
8" x 4 1/2" - score at 1", 3 1/2", 4 1 /2", 7" on long side, and 1", 3 1/2" short side
Cut away all 4 corners from each piece, and small cuts in the middle section as shown, to help the box close more neatly.
Using a strong tape or glue, fold all sides in on the boxes, ensuring that the 3 outer flaps are not cut away. This will ensure that the outer of the box is neat and tidy.

Once finished adhere the 3 boxes into a tier, ensuring you use strong glue or tape.
Wrap the bottom edge of each of the boxes with ribbon to co-ordinate to your project. I've used the new Ombre Ribbon in Island Indigo.

Decorate as required - keeping in mind the scale of decoration to the size of the box. I have used an old flower punch, but there are lots of alternative dies in the Stampin' Up! catalogues which would work really well.
If using flowers:-
Lay the flowers onto a piercing mat and rub over the middle of the flower with a ball tool, this will make the flowers curl up, to give a more realistic display.

Add as few or as many flowers to your project until you are happy with the appearance. I used a lot of flowers to create a cascade down the cake.
To adhere my flowers, I used the fabulous new Mini Dimensionals from Stampin' Up! - they are ideal for small / intricate flowers or decorations.

To create the lid, I decided to use the Tranquil Tide cardstock to co-ordinate with the main box, however, you can choose a co-ordinating colour.
The lid is cut from a piece of card 6 1/8" x 6 1/8" - scored along each side at 1".

I attached a piece of the DSP the same as the outer sides of the box. Stick the sides of the lid together, using a strong tape or glue.
I then wrapped a piece of Pool Party Shimmer Ribbon around the lid, and added a Tranquil Tide Itty Bitty Bow from the 2017-2019 embellishments to complete the project.

This is simply stunning, thank you so much for your generosity in sharing the instructions.
ReplyDeleteThank you x
DeleteThank you for sharing - a beautiful project x
ReplyDeleteThank you x
DeleteThank you so much for taking the time to do this tutorial. It's a stunning project.
ReplyDeleteThank you x
DeleteWow!!
ReplyDeleteThank you x
DeleteLove the box! But are you sure the measurements for the cakes are correct? I got a very different looking box.
ReplyDelete